Initial setup
This tutorial will walk you through the initial AppPack setup in your AWS account. You will connect your AWS account to AppPack and setup your initial cluster for installing apps. This process should take about 25 minutes to complete, with the majority of waiting for AWS to spin up resources and setup a domain.
📝 Prerequisites
You'll need a few things ready to go to complete this tutorial. Make sure you've taken the following steps before getting started.
- Installed the
apppackCLI (see Install the CLI) - Setup an AWS account with access to an admin user or role.
- Create a free Docker Hub account and generate an access token.
🏗 Setting up AWS resources
⏳ Estimated Time: 3 minutes
Get started by clicking the "Launch Stack" button for your preferred region1 below. This will open up the AWS console and install the initial account-level resources so we can start using AppPack.
| Stack | Region |
|---|---|
 |
US East (Ohio) us-east-2 |
|
US West (Oregon) us-west-2 |
|
US East (N. Virginia) us-east-1 |
|
Asia Pacific (Seoul) ap-northeast-2 |
|
Asia Pacific (Mumbai) ap-south-1 |
|
Asia Pacific (Singapore) ap-southeast-1 |
|
Asia Pacific (Sydney) ap-southeast-2 |
|
EU (Stockholm) eu-north-1 |
|
EU (London) eu-west-2 |
This will drop you into the AWS Cloudformation Stack creation form. It is split into four steps:
- Specify template
- Click
Next
- Click
- Specify stack details
- In the
Administratorsfield, enter your email address and the email addresses of anyone else you'd like to grant full admin access to your account.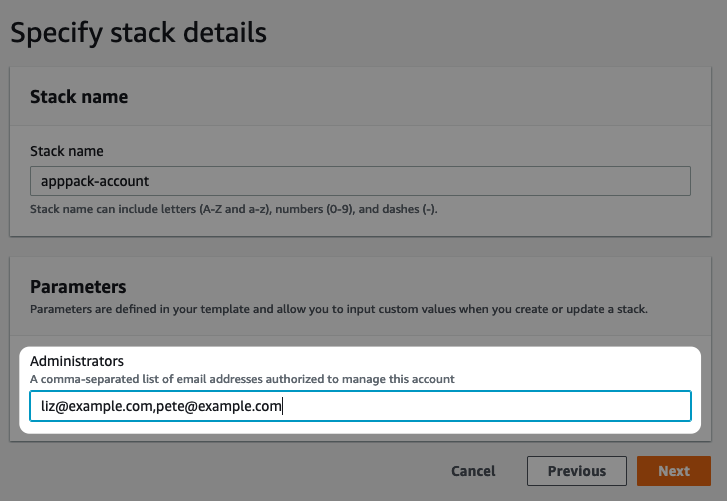
- Click
Next
- In the
- Configure stack options
- Click
Next
- Click
- Review
- At the bottom of the page, check the box for I acknowledge that AWS CloudFormation might create IAM resources.
- Click
Create stack
🔐 Authenticate AppPack CLI
⏳ Estimated time: 1 minutes
Next, run:
apppack auth login
You'll be able to login or create a new account if you don't have one already. If you login with an email address and password, be sure to verify your email address before continuing.
Verify you are setup as an administrator:
apppack auth accounts
You should see your AWS account listed in the output.
🌐 Setup a domain
⏳ Estimated time: 15 minutes
You'll need to assign a domain to your cluster. If you used example.com for your cluster, apps you create on the cluster will be available at https://{appname}.example.com. You can use a custom domain for production apps, so this domain is typically just used internally.
The easiest option here is to register a new domain in your AWS console. Depending on the TLD you choose, they can be had for as little as $3/year (looking at you .click 👀).
Warning
⏳ This isn't an instant process, so be prepared to wait at least a few minutes for your domain to move from Pending to Registered. Also make sure you've entered your billing info in the AWS console to avoid any extra delay.
Info
If you'd rather use a domain you already own, see the Bring Your Own Cluster Domain how-to.
👷♀️ Create your cluster
⏳ Estimated time: 7 minutes
Now you're ready to create the cluster for your apps. To do this, run:
apppack create cluster
You'll get a confirmation prompt about the region where the cluster will be installed. Type yes and you'll be prompted for:
- Your Docker Hub username and access token
- Your domain you created above
This should run for about 10 minutes while AWS creates all the necessary resources.
Pricing
Some resources created during this process may incur monthly AWS charges. Read Under the Hood: Pricing for more information.
🏁 Next step
Congrats! Now that your account has been approved, you're ready to deploying apps. Continue on to the Deploy Your First App tutorial
-
See Choose an AWS Region for more info ↩